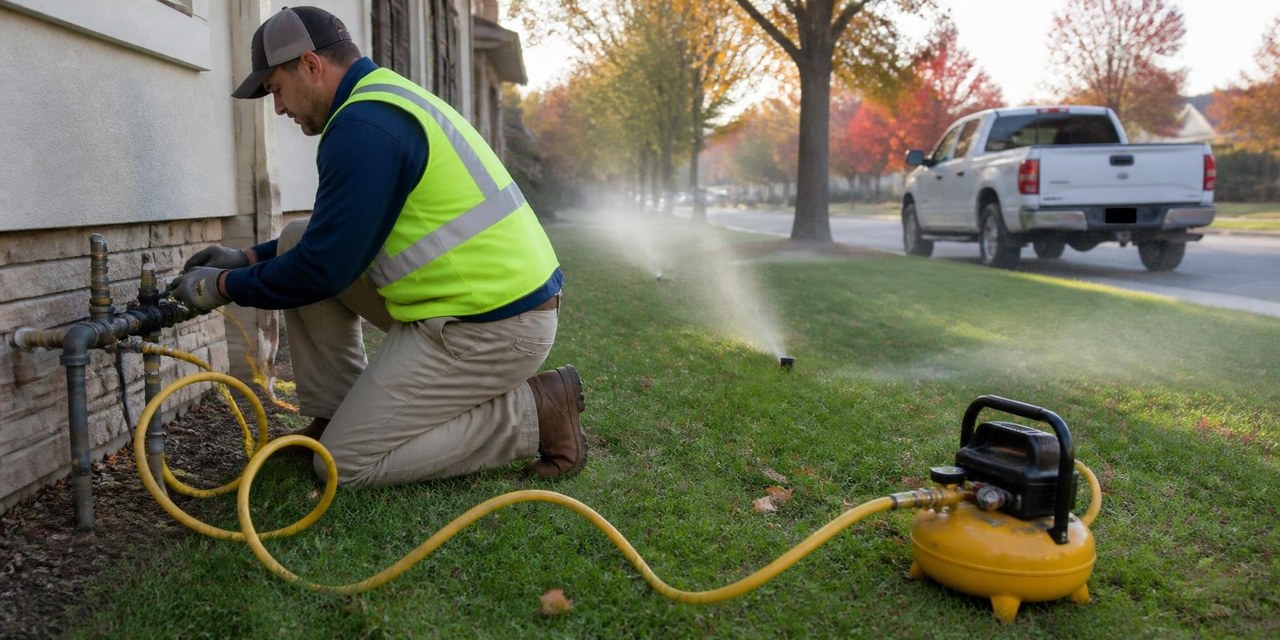
Most shops price a sprinkler blowout as a flat base covering a typical system, with a small per-zone add-on for larger ones — and that base should come from your actual cost per stop, driven mainly by how many stops you finish in a day, what the compressor costs per stop, and how much drive time sits between addresses. A solo tech running twelve stops on a tight route with a $250-a-day rental has a fundamentally different cost structure than a two-person crew doing eight scattered stops on the same rental. Build your price from the bottom up in the calculator before you post any number.
What a Sprinkler Blowout Stop Actually Costs
Before you can set a price, you need a cost. The cost of a single blowout stop breaks into four pieces: labor for the time you're on-site, compressor allocation for the machine running the air, overhead on both, and drive time to get there. Each of those has a clear source document — your payroll records, your rental invoice or owned-machine depreciation schedule, your overhead tally, and your route sheet.
The worked example below is made-up and labeled as such. It uses a solo tech, a 6-zone residential system, a tight 12-stop route, and a $250/day rental split across all twelve stops. Substitute your own numbers when you run the calculator — these inputs are starting points to illustrate the formula, not industry averages.
On a 6-zone residential stop, most of the time is setup and teardown, not air time. If you run each zone in two short cycles of about 2–3 minutes, plus 15 minutes of fixed time (connecting the compressor, setting the controller, disconnecting, and checking that all zones completed), your per-stop time comes to roughly 30 minutes: (15 fixed minutes + 6 zones × 2.5 minutes) ÷ 60 = 0.5 hours. Get this number from your actual stop log or time a few stops yourself before you set prices for the season.
At 20% margin, that $98.16 is a floor — not a quote. Your labor rate, compressor cost, overhead percentage, and drive will all differ. What matters is the structure: zone count feeds into Estimated Hours, compressor cost goes into Material Cost at 0% markup, and drive time is entered once at your labor rate for a solo tech, with the second worker's ride time added for a two-person crew (Step 3 shows how).
Flat Rate, Per Zone, or Both: Structuring Sprinkler Winterization Pricing
The most common structure is a hybrid: a flat base covering a typical system up to a defined zone count, then a small add-on per zone above that threshold. Shops in the Midwest and mid-Atlantic often call this service sprinkler winterization — same procedure, different regional vocabulary. Per-zone pricing from zone one creates unpredictable revenue on small systems and under-recovers fixed setup costs — the fixed setup time is the same whether you have 4 zones or 8, and the per-zone time difference is relatively small.
To find your per-zone add-on rate from the calculator rather than guessing a number:
- Run the calculator at your typical zone count. In the made-up baseline example, 6 zones at 0.5 hr produces a Suggested Charge of $98.16.
- Run it again at a large system. At 14 zones (0.83 hr, rounded), the Suggested Charge is $123.84.
- Subtract and divide by the zone difference: $123.84 − $98.16 = $25.68 ÷ 8 added zones = $3.21 per zone on the calculator's cost-plus-margin math for added labor time alone.
That $3.21 reflects only the added on-site time at the baseline rate and overhead. Whether to charge more — to buffer for larger-system uncertainty, cover a cleaner published number, or match your local market — is your judgment call. Use the calculator result as your floor.
On a tight 12-stop route with a $250/day rental, your compressor allocation ($21) and travel ($15.25) together equal your labor cost ($22.50). Those two inputs are where prices move most. Set your base to cover them, then add a per-zone rate for systems larger than your typical stop.
How to Build Your Price in the Calculator
The calculator has no dedicated field for zone count, no compressor line, no per-stop minimum, and no route mode. Those inputs each translate directly into existing fields. Here is the step-by-step translation:
- Open the calculator and overwrite the Landscaper preset. The Landscaper preset loads Hours: 5, Workers: 2, Rate: $45, Material: $100 at 20% markup, Overhead: 15%, Drive: 1.0 hr, Fuel: $20. That configuration is sized for a full morning of landscape work — not a 30-minute residential blowout stop. Change every field before you read any result.
- Enter Estimated Hours using zone count and fixed time. The calculator has no zone field; zone count determines hours. Add your fixed setup minutes to zones times minutes per zone, then divide by 60. A reasonable starting point for residential work is 15 fixed minutes and 2–3 minutes per zone run in two short cycles. For a 6-zone stop: (15 + 6 × 2.5) ÷ 60 = 0.5 hr. For a 10-zone stop: (15 + 10 × 2.5) ÷ 60 = 0.67 hr. If you don't have real time data yet, time your first dozen stops of the season and use that to update the formula.
- Enter Number of Workers. A solo tech is 1; a two-person crew is 2. The calculator multiplies labor hours by worker count but bills drive time once at the labor rate. That's accurate for a solo tech, where the drive is purely a vehicle cost. For a two-person crew, the second worker is also being paid while riding to the stop — that cost isn't captured by the single-rate drive field alone. To account for it, either enter Drive Time as the actual drive hours multiplied by 2, or add the second worker's pay for the drive to the Fuel / Travel Cost field.
- Enter your Hourly Labor Rate. This should be your fully loaded field rate — what you pay the worker plus your share of payroll taxes, workers' comp, and any other direct labor burden. If you are the owner doing the work, use the rate you would pay a qualified tech. Your time isn't free because you own the business.
- Enter compressor cost as Material Cost at 0% markup. The calculator has no equipment or compressor field. Enter your per-stop compressor allocation in Material Cost and set Material Markup to 0% — you're recovering cost, not marking up a product. Alternatively, fold the equipment cost into Overhead & Burden as a percentage (see the compressor section). Divide your daily rental cost (or owned-machine daily cost) by the stops you complete that day to get the per-stop allocation.
- Enter Overhead & Burden as a percentage of labor plus materials. This covers office costs, insurance, equipment wear, and anything else not in labor or materials. Your overhead ratio should come from your actual books — divide your monthly overhead costs by your monthly labor plus materials costs to get the percentage. See the overhead percentage guide for the full calculation.
- Enter Drive Time and Fuel / Travel Cost for your per-stop route share. Divide total route drive hours by stops on that route to get your per-stop drive time. Whether you bill drive time on the invoice is a separate policy question (see should contractors charge for drive time); what matters here is that the cost appears in your inputs.
- Set Desired Profit Margin and tax fields. SE Tax defaults to 15.3% and State Tax to 5% — both applied to the cost subtotal, not to the suggested price. If you're in a state with a different rate, update the State Tax field. The Desired Profit Margin uses margin math: 20% margin means the profit is 20% of the price, not 20% of the cost. If you think in markup, see the markup vs. margin guide before entering a number — the two are not interchangeable.
- Read the Suggested Charge. That is your floor for this specific configuration of inputs. Change any input — more zones, more drive, fewer stops on the compressor — and the suggested charge moves.
For the minimum charge, run the calculator with your smallest typical system — say, a 2-zone residential setup — and use the resulting Suggested Charge as your posted floor. Your minimum comes directly from running the calculator on your cheapest stop.
Compressor Cost: How Many Stops You Complete Decides the Per-Stop Number
The compressor is the most misunderstood cost on a blowout route. Shops often price as though the machine is free because it sits in the yard or on the trailer — but whether rented or owned, it carries a real daily cost that must be recovered from the stops completed that day.
Per-stop compressor allocation = daily cost ÷ stops completed.
That equation punishes slow days. On a $250/day rental with 12 stops, each stop carries $20.83 in compressor cost (enter as $21). On the same rental with 6 stops — a realistic outcome with no-shows, access problems, or a short day — each stop carries $41.67 (enter as $42). The two scenarios produce materially different suggested charges even though every other input is identical.
The $36 difference between Scenarios A and B — same rental, same tech, same system — is a direct consequence of how many stops ended up on the route. If you price every blowout at Scenario A rates but regularly have Scenario B days, you are systematically undercharging on roughly half your work.
Renting
Enter your half-day or full-day rental rate from the invoice. Divide by the stops you actually complete, not the stops you plan to complete. If your route has no-shows or access failures, your allocation goes up. Build your pricing from a realistic stop count.
Owning
Divide the purchase price by its working life in days, add maintenance and fuel per day, then divide by expected stops per day. Don't let an owned machine become an invisible cost by treating its absence from the rental invoice as zero cost — allocate it to each stop just as you would a rental.
CFM and pressure
On CFM sizing, K-Rain's blowout guide calls for a minimum of 20–25 CFM. Hunter's general winterization guide recommends calculating required CFM by dividing the GPM of your largest zone by 7.5 — a formula CSU Extension's Fact Sheet 4.719 also uses. Hunter's valves and winterization procedures page specifies 80–100 CFM for mainlines up to 2 inches in diameter.
On pressure, K-Rain caps blowout pressure at 50 psi on all pipe types. Hunter and CSU Extension both allow up to 80 psi on rigid PVC and cap polyethylene at 50 psi. Hunter's guidance adds the practical governing rule: stay below the maximum operating pressure of the lowest-rated component in the zone. Regulate at the compressor outlet.
Connect the airline downstream of the backflow device — never push air through the backflow preventer.
Route Density and Drive Time
Drive time is the other input that moves blowout prices sharply. On a dense city-day route where stops are clustered in a few neighborhoods, drive time per stop might be minimal. On a scattered suburban route covering a wide area, the per-stop drive share can be as large as the labor cost itself.
The $52 range between a dense route and a scattered one — with identical zone count, labor rate, compressor cost, and overhead — comes purely from drive. Shops that schedule by city-day (dedicating each day to a specific geographic cluster) compress per-stop drive time and lower their cost structure, which lets them either offer a more competitive price or hold the same price at a higher margin.
Enter Drive Time as your per-stop share of the route (total route drive ÷ stops). Fuel / Travel Cost is the incremental fuel for that stop's share of the route. For the billing question — whether to show drive time on the customer invoice — see should contractors charge for drive time.
No-Access, Not-Home, and Return Visits
A locked gate, a dog blocking the valve box, no one home to let you into the basement shutoff, or a valve box buried in mulch — all of these come up on every blowout route. Each one costs you a stop's worth of drive and setup time without a billable result unless you have a written policy.
Set these four policies before the season starts.
No-access fee
If you arrive and cannot complete the blowout — locked gate, buried valve, no access to the interior shutoff — charge a stated trip fee. Run the calculator with your drive time and your real setup minutes entered as hours (connecting and disconnecting takes time even when no zone runs), and zero zone purge time, to find the floor for that fee.
Not-home and cancellation
If the customer was supposed to be present and is not, the same logic applies. Pick a specific cancellation window (for example, 24 hours), state it clearly at booking, and charge same-day no-shows at your standard trip fee.
Return visit charge
If you complete the blowout but the customer calls back believing a zone was missed or improperly purged, your return trip is a new cost event. For building a financial reserve to cover freeze-damage returns without eating your margin, see building a callback reserve.
Late-cancel fee
A same-day cancellation after you've loaded the trailer and left the yard deserves the same treatment as a no-show. Some shops match their standard trip fee; the amount matters less than the consistency of enforcement.
If callbacks happen more than occasionally, bump the Overhead & Burden percentage in the calculator to build a reserve into every job — the same principle as any callback-risk business.
Setting Your Minimum Charge
The calculator has no minimum charge field. Set yours by running the smallest system you realistically encounter — a 2-zone setup is a reasonable floor for residential work — and using that job's Suggested Charge as your posted minimum. Here is that calculation with the same baseline inputs as the worked example above, only hours changed to reflect a 2-zone system: (15 fixed minutes + 2 zones × 2.5 minutes) ÷ 60 = 0.33 hr (rounded).
That $84.93 is only about $13 less than the 6-zone suggested charge of $98.16 — because the fixed costs are the same for both stops. Set your minimum there (or wherever your own 2-zone calculation lands) and communicate it clearly before booking. "Minimum charge of $[X] for any system" removes the awkward conversation at the door.
Solo Tech vs Two-Person Crew, and the Owner Doing the Work
Adding a second worker to the stop changes the labor calculation in one specific way: the Workers field multiplies labor hours by worker count. A 0.5-hour stop with 2 workers bills 1.0 total labor-hour. At $45/hr, that's $45 in labor vs. $22.50 solo. The two-person model only makes sense economically when the second person materially speeds up the stop — compressing 30 minutes to 20 minutes allows more stops per day and lowers the compressor allocation per stop. Run the numbers both ways before committing to a crew configuration for the season.
The made-up example below uses the baseline inputs with Workers set to 2 and Drive Time doubled to 0.5 hr (entering 0.25 hr × 2 to account for both workers being paid during the drive):
The two-person stop costs $55.82 more than the solo baseline ($153.98 vs. $98.16). If the second person doesn't speed up the route, the higher price per stop has to hold on its own.
If you are the owner doing the blowouts yourself, enter a labor rate in the calculator even though you don't write yourself a paycheck for field hours. Use the rate you would pay a qualified tech, or the rate you could be earning doing other work. Paying yourself $0 to do a job is an invisible subsidy that makes your pricing look healthier than it is.
Late-Season and Cold-Snap Calls
Once the regular route season closes and a customer calls for a single emergency blowout, the cost structure is entirely different. You are mobilizing the compressor for one stop rather than spreading it across a full day of work. Drive may be cross-town. Your tech may be pulling from a different schedule at overtime rates. A properly priced late-season one-off runs substantially higher than a route stop.
This example assumes 0.75 hr for a late-season one-off (unfamiliar property, full setup for one job, no route efficiencies). Adjust to your own stop times.
The $484.35 reflects the actual costs: a half-day rental allocated entirely to one stop ($175), an elevated labor rate reflecting out-of-schedule work, and a longer drive. If you price the same stop at $117.61 when your actual cost is $387.48, you take a loss on every late-season call you accept at that rate.
Whether and how to apply a late-season premium — a higher rate, a flat fee, a published "after-season" price tier — is a policy question. For the math behind late-season overtime rate structures, see the after-hours rate guide. Price late-season one-off calls from their own cost inputs.
Add-Ons, Backflow, and the Fall-to-Spring Bundle
A blowout stop is often the only visit a property gets in the fall. That makes it a natural anchor for add-on services and for pre-booking return visits you'll execute in spring.
Extra backflow assemblies
Properties with more than one backflow preventer carry extra work at each additional assembly. Enter the time for each additional assembly into Estimated Hours, and if there is any material cost (cleaning, minor fitting), add it to Material Cost. Shops commonly charge $15–$20 extra per additional assembly above the standard one; your calculator will tell you whether your number clears cost and margin.
One important distinction: the blowout connects downstream of the backflow device and pushes air through the zones. Backflow testing — verifying that the preventer is mechanically functioning — is a separate, regulated service in many jurisdictions. Denver Water requires annual backflow testing by a certified tester. Minnesota requires certification for anyone performing or offering testing or repair of backflow assemblies. Check with your state licensing board and your water district before you offer backflow testing as a paid line item; do not assume the service is exempt from certification requirements in your area.
Drip zones and extra hook-ups
A property with drip irrigation zones, a separate hose-bib connection, or an unusual valve configuration takes longer than a standard zone count suggests. Add the extra setup time to Estimated Hours. If an extra hook-up point requires the crew to reposition equipment, add that time as well. Some shops charge a flat extra-hook-up fee; translate that fee into your calculator inputs to confirm it covers cost and margin before publishing it.
Same-visit fall services and the spring package
If you are already on-site, you may be able to add a fall service without a separate mobilization cost. If pricing fall leaf cleanup is already part of your service menu, a same-visit offer can improve revenue per stop without adding route drive. Price the cleanup as its own calculator job (separate hours, zero drive), add it to the blowout price, and give the customer a clear line item for each service.
Pre-booking the spring activation at the blowout visit converts a single seasonal stop into a two-stop relationship. The spring start-up is a separate job with its own cost stack. Using the made-up baseline inputs with adjusted hours (0.75 hr for a typical start-up, no compressor needed, $3 fuel), the spring start-up produces its own suggested charge:
If you want to offer a small bundle discount to incentivize pre-booking, you now know your floor: $177.95 covers both jobs at 20% margin. A $10 discount reduces total revenue by $10 — make it a deliberate choice. Locking in the spring visit at blowout time also reduces your spring booking overhead and protects the appointment from competitors calling in March.
A Few Pricing Mistakes Worth Catching Early
Charging large systems at small-system rates
The per-zone steps above show the math: charging 6-zone rates for a 14-zone stop ($25.68 gap, $3.21 per added zone) leaves a shortfall that accumulates across every large property on the route. Use zone bands with explicit pricing, or enter actual hours for each configuration.
Marking up the compressor allocation
If you enter the compressor rental as Material Cost and apply your standard materials markup, you're charging the customer a margin on equipment as though it were a product you're reselling. Set Material Markup to 0% for the compressor allocation. Decide your approach and apply it consistently across all jobs.
Not reviewing prices mid-season
A price set in September based on 12 expected stops may be wrong in November based on 7 stops. If your rental rate goes up, your labor rate changes, or your stop count drops consistently, run the calculator again. Schedule a quick calculator refresh at the start and midpoint of the blowout season.
Frequently Asked Questions
If I find a backflow preventer I'm not certified to test, should I note it on the invoice or just skip it?
Note it. A written record that you identified the device, confirmed it was excluded from the blowout procedure, and that testing was not included protects you from liability if the device fails later and someone asks whether it was inspected. If backflow testing certification is required in your jurisdiction and you're not certified, offer to refer the customer to a certified tester or check whether your local water district publishes a tester list. Making the exclusion explicit is better than leaving it ambiguous — and it opens a referral relationship if you later get certified or partner with someone who is.
The Bottom Line
Build your baseline in the calculator using your real inputs, derive your minimum from your smallest system, and review the numbers when route density or compressor cost changes.
This article is for educational purposes only and does not constitute legal, financial, or tax advice. All dollar figures and examples are made-up for illustration; they do not represent typical prices, rates, or costs in any market. Backflow device certification requirements vary by state and water district — check with your local licensing board and utility before offering testing services. Consult qualified professionals for advice specific to your business and jurisdiction.